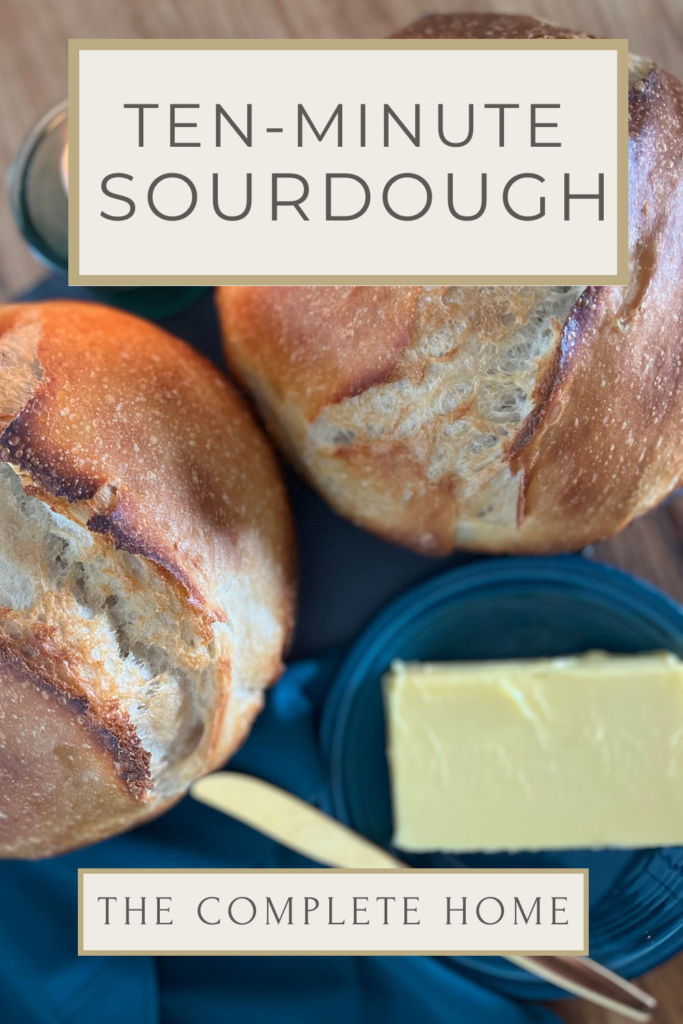
Sourdough Bread Baking in Only Ten Minutes a Day
Like many homemakers, I’ve deemed sourdough bread to be a necessary staple in our home. The benefits to our gut health and digestion, the superior flavor to store bought bread, and the lower cost of homemade bread all contribute to the worthiness of this endeavor.
And it HAS been an endeavor…
From having an out-of-state friend send me a starter, to then making my own (my darling husband was cleaning the kitchen and washed the gifted starter down the drain);
From trying to follow online directions on a popular blog to giving up and buying expensive sourdough loaves from local bakeries;
From trying again with Einkorn flour and a different method (and LOVING it) to eventually burning out again;
From reading books and searching blogs to finally happening upon the godsend of a method I now use, which requires only ten minutes or so of my time on any given day.
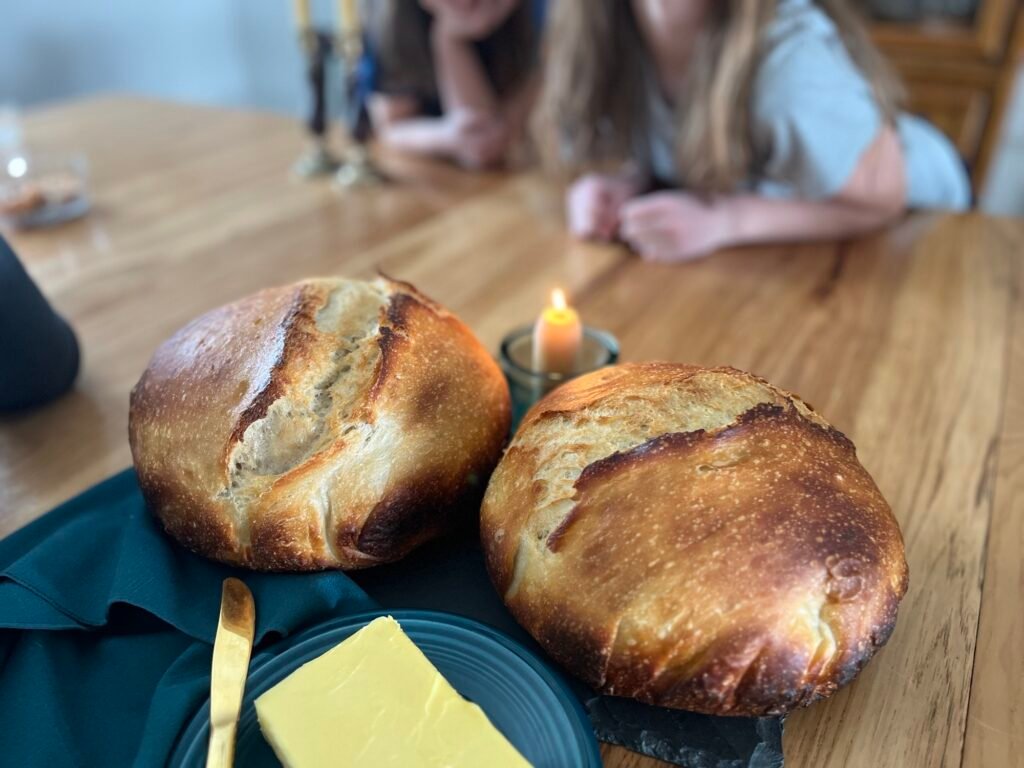
I can now easily keep my six children supplied with fresh sourdough, to their ravenous delight.
The credit goes to the lovely Anja of Our Gabled Home. I found her YouTube channel and blog through my mother-in-law when we were preparing a German-themed meal and needed a recipe for spaetzle. I was intrigued by Anja’s German heritage (which I share, but about which I know little), and perused several of her videos.
Almost buried within her comprehensive sourdough content was this method that was more hands-off than any other I’d previously encountered, and PERFECT for my busy days of caring for a family of eight. I have now adapted this method for my own needs, and am eager to share it with others who might otherwise find sourdough baking overwhelming.
The Method
I bake two loaves at a time, which requires two Dutch ovens. If you only prepare one loaf at a time, you’ll need to cut down the baking time.
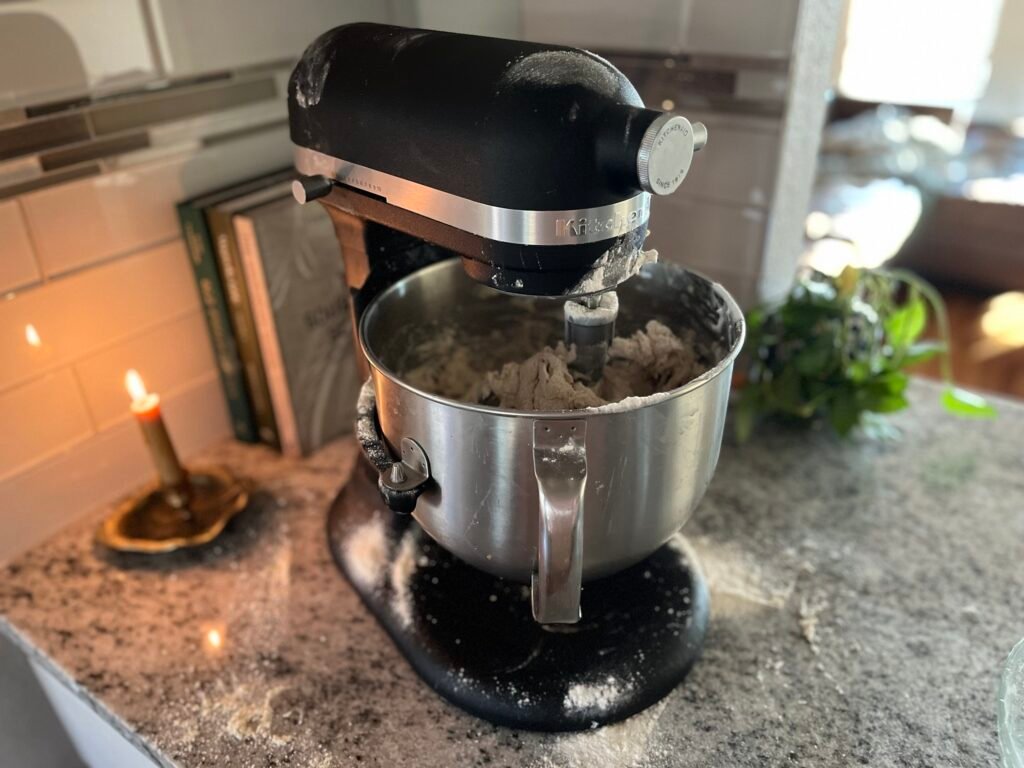
Additionally, I use a stand mixer, which saves me some work and helps streamline the preparation.
The day before baking, I begin with my mixer bowl on my kitchen scale, and measure in 400 grams of active starter. (I keep my starter in the refrigerator and only feed it when I use it.)
To the bowl on the scale, I add 1,050 grams of warm water (and add some water to my starter jar while I’m at it, to begin the process of feeding my starter).
On top of the warm water and starter in the mixing bowl, I sprinkle a pinch of yeast. As Anja says, it’s simply “insurance” that the bread will rise well. Why not?
After attaching my bowl to my mixer, I use the paddle attachment on the lowest speed while I measure out my dry ingredients.
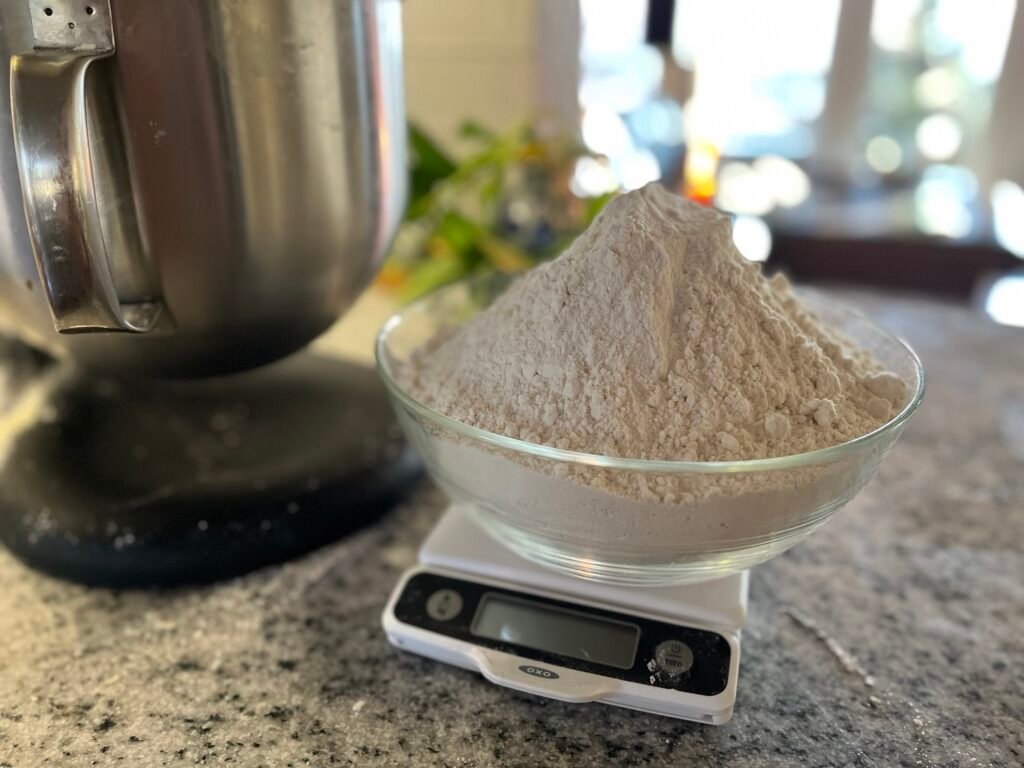
Into another bowl on my kitchen scale, I measure 40 grams of sea salt (I do this first because it’s easier to correct a mistake of adding too much), and 1,400 grams of flour. I generally use organic all-purpose flour that I buy at Costco, but any all-purpose flour will work. Anja encourages experimentation with other grains for part of the flour; I’ve tried einkorn and rye on separate occasions, and the flavor each one added to the loaves was delicious. (At this point of adding flour to the bowl, I also add flour to my starter jar, give it a vigorous stir, and when the consistency is like thick pancake batter, put it back into the refrigerator. Feeding done.)
With the stand mixer still running on the lowest speed, I add the flour and salt to the bowl, and mix until fully incorporated. If I have no need for my mixing bowl until the next day, I simply leave the dough in the bowl and cover it, placing it in the refrigerator overnight.
Done for the first day!
On the next day, I line each of my Dutch ovens with unbleached parchment paper. (Don’t skip the parchment paper, or the bread will stick to the inside of the Dutch oven.)
I turn out the dough on a floured surface and knead it until it’s smooth and elastic, no longer sticky. Then I divide the dough in half and shape each half into a boule (round loaf), pulling each along the counter to create some tension on the surface of the loaf.
I set the boules in the parchment-lined Dutch ovens, cover with the lids (no need to score the tops with this method), and let them proof in a warm place for two hours. I usually do this inside my oven, which has a “bread proof” setting. When that setting isn’t available, turning on the oven’s interior light works well to generate a bit of heat for proofing.
When the two-hour timer rings (provided the dough has nearly doubled in size), I leave the Dutch ovens side by side on the center rack and set the oven temperature to 450 degrees, simultaneously setting the timer for one hour and ten minutes. (Yes, the Dutch ovens remain in the oven during the preheating.) You’ll have to experiment with the right timing for your own oven, but the goal is thoroughly baked loaves with crispy crusts.
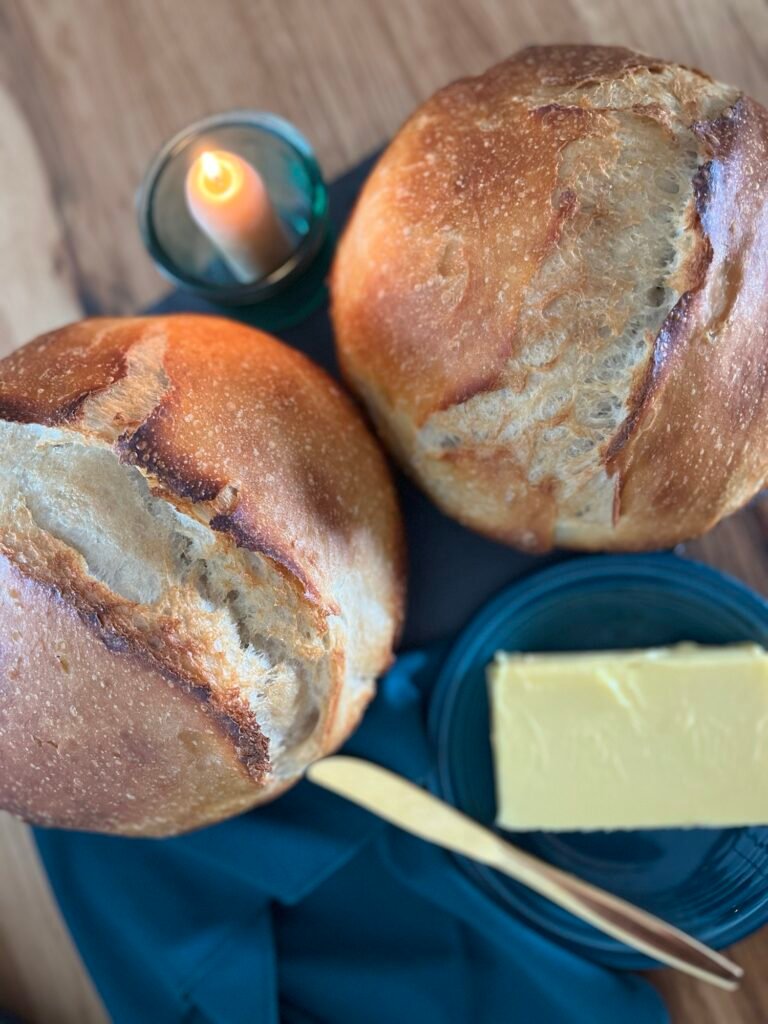
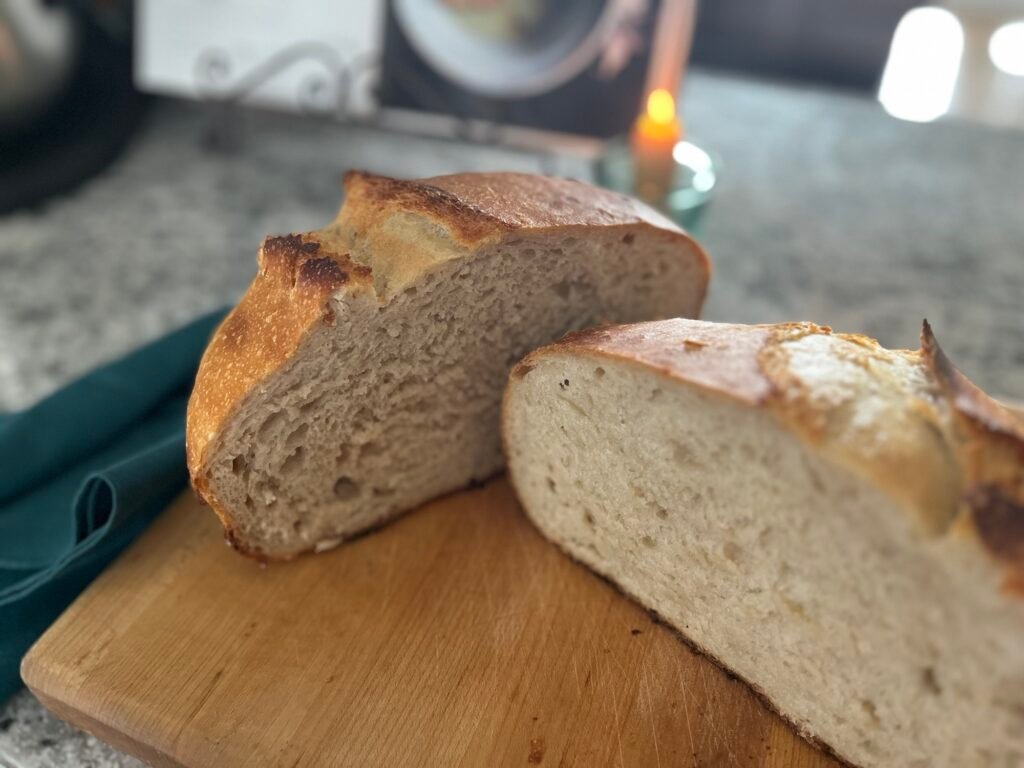
When the baking timer rings, I remove the loaves immediately from the Dutch ovens and parchment paper, and let them cool on wire racks. Often the top of the loaves will have split open organically, creating the most tempting crispy ridges!
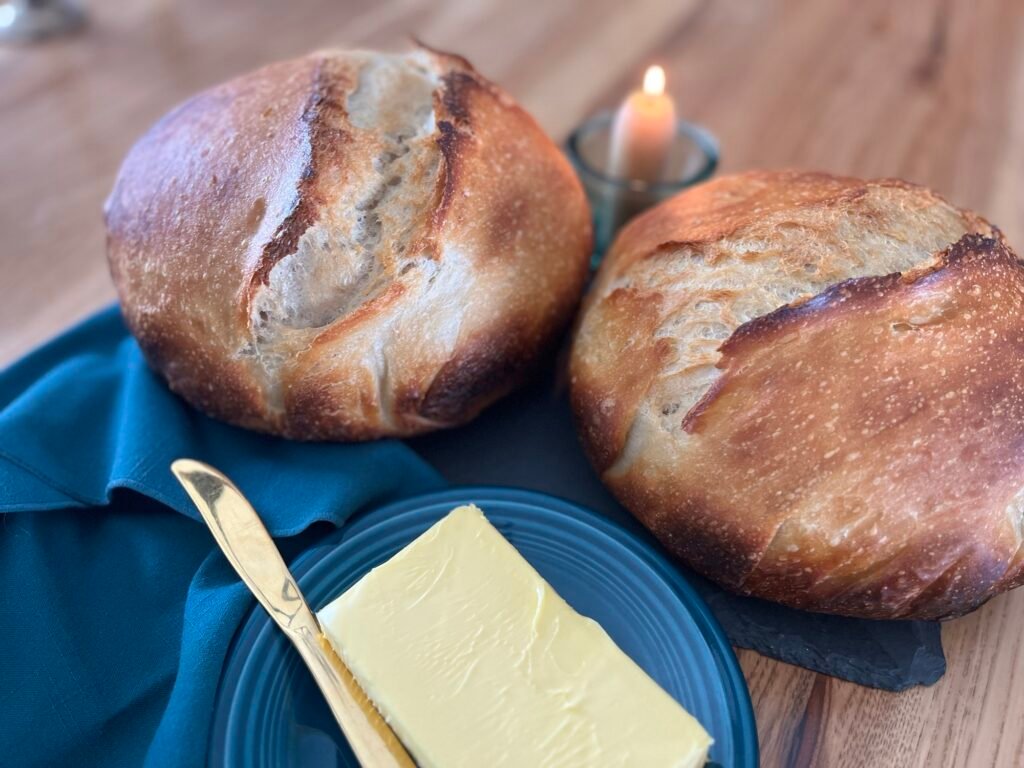
Once cool, I cut a loaf in half and then slice it for my family to use for toast or sandwiches. The second loaf is ready and waiting (covered or wrapped) for whenever we need it.
I’m forever grateful to have encountered this incredibly simple method of sourdough bread baking for this season of my motherhood. A plethora of methods await for future exploration. If you’d like to see the website that introduced me to this method I use, you can find Anja’s blog, Our Gabled Home, here. 🌿